Getting Started
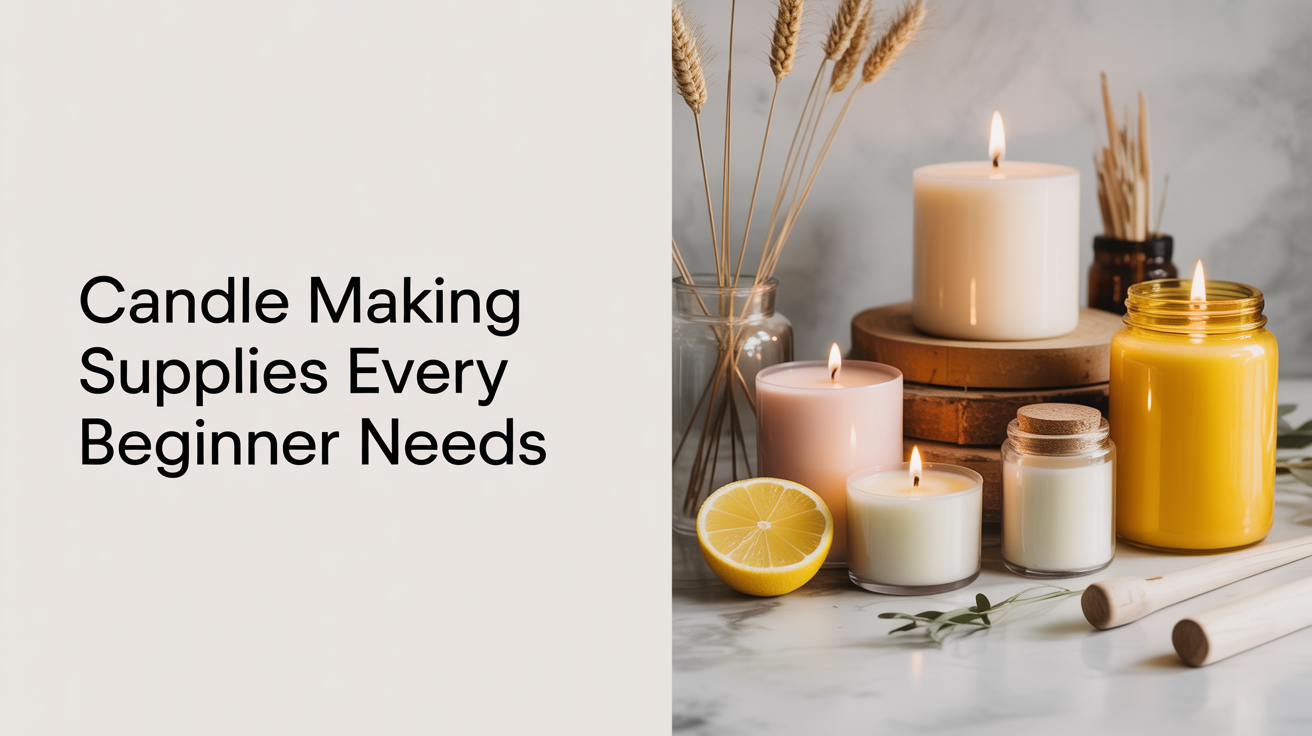
Candle Making Supplies Every Beginner Needs
A complete beginner's checklist for candle making supplies: wax, wicks, containers, fragrance, tools, and what you can skip until later.
You need less than you think to make your first candle. A bag of wax, a few wicks, a container, some fragrance oil, and a couple of basic tools will get you there. The list below covers everything worth buying now, a few things worth skipping until you have a few batches under your belt, and a simple starter shopping list you can take straight to your supplier.
The Core Supplies You Actually Need
These are the non-negotiables. Skip any one of them and your first batch will either fail or become a safety hazard.
Wax
Soy wax is the most forgiving option for beginners. It melts cleanly, throws fragrance well, and is easy to source in small quantities. Coconut-soy blends are also popular and tend to give a smoother finish. Paraffin is cheaper and gives excellent hot throw, but it requires more precise temperature management and produces more soot. Start with soy until you understand how wax behaves.
Buy a 5 lb or 10 lb bag to start. That gives you enough for 4–8 containers without committing to a bulk order you might regret if you want to switch wax types.
Wicks
Wicks are the most misunderstood part of candle making. The wrong size and your candle will either tunnel (leaving unmelted wax on the sides) or create a flame that's dangerously large. Wick sizing depends on your container diameter and your wax type, so look up a wick guide from your wax supplier before buying.
Cotton core wicks in a tabbed, pre-waxed format are the standard for container candles. The metal tab holds the wick at the bottom of the jar. Buy a sampler pack with a few different sizes so you can test.
Containers
For your first candles, use straight-sided glass jars. Mason jars work. Apothecary jars work. Straight sides make it easy to center your wick and easy to see the wax as it sets. Avoid anything with a narrow neck or a taper, those create uneven melt pools.
If you want to understand the trade-offs between container styles before you buy, container candles vs pillar candles walks through the differences and why most beginners should start in containers.
Fragrance Oil
Candle-specific fragrance oils are formulated to survive the heat of melted wax and still throw scent when the candle burns. Essential oils can work, but they're expensive, many have low flash points, and the scent often fades fast in a finished candle. Stick with fragrance oils for your first few batches.
Most waxes hold between 6% and 10% fragrance by weight. Your supplier will list the maximum fragrance load for your specific wax. Don't exceed it. Oversaturation causes the oil to pool on top of the candle or prevent it from setting properly.
A Kitchen Scale
You measure everything by weight in candle making, not volume. A digital kitchen scale accurate to 1 gram is essential. Eyeballing your fragrance percentage will result in inconsistent candles and, if you overshoot, a fire hazard. A basic postal or kitchen scale works fine.
A Thermometer
This is the other non-negotiable. You need to know the temperature of your wax at every step: when to add fragrance (usually around 185°F for soy), when to pour (typically 135–145°F), and how to avoid flashpoint issues with fragrance oils. A candy thermometer or a digital probe thermometer both work. Infrared thermometers are convenient but read surface temperature only, which can be misleading when you have a layer of cooler wax on top of hotter wax below.
Pouring too hot causes sinkholes and frosting. Pouring too cold can cause the wax to set before it bonds to the container. A thermometer is how you control both.
A Melting Pitcher or Double Boiler
Never melt wax directly in a pot on the stove. You need indirect heat. A double boiler setup (a heat-safe pitcher or pot inside a larger pot of simmering water) keeps the temperature steady and prevents scorching. Purpose-made candle pitchers with a pour spout are worth buying. They're cheap, and the spout makes pouring into small containers much easier without spills.
Wick Stickers or a Wick Bar
You need to hold the wick centered while the wax sets. Wick stickers (small adhesive dots) attach the metal tab to the bottom of your container. A wick bar or a couple of chopsticks laid across the top of the jar keep the wick from drifting before the wax hardens. Both cost almost nothing and make a real difference in finished candle quality.
Nice-to-Have Supplies (Buy Later)
These are genuinely useful, but you don't need them for your first batch.
Candle Dye
Color is purely aesthetic. It has no effect on burn quality. Start with natural wax color first so you can focus on scent load and wick size. Once those feel dialed in, dye chips or liquid candle dye are easy to add.
Heat Gun or Hair Dryer
A heat gun is useful for fixing sinkholes (small craters that form on top as the wax cools) by melting and re-leveling the surface. It's also handy for removing air bubbles. It's not essential on your first pour, but most candle makers add one within the first few months.
Labels
If you're making candles as gifts or to sell, proper labels matter. For personal use, a piece of tape with a handwritten name is fine while you're still testing.
Starter Supply Table
| Item | What it's for | Essential or Later |
|---|---|---|
| Soy or coconut-soy wax | The candle body | Essential |
| Tabbed cotton wicks | Controls the flame | Essential |
| Glass containers | Holds the wax | Essential |
| Fragrance oil | Scent | Essential |
| Digital kitchen scale | Measuring by weight | Essential |
| Thermometer | Safe pour temps | Essential |
| Melting pitcher | Safe indirect heat | Essential |
| Wick stickers | Secures wick to bottom | Essential |
| Wick bar or chopsticks | Centers wick while cooling | Essential |
| Candle dye | Color only | Later |
| Heat gun | Smoothing surface sinkholes | Later |
| Labels | Presentation | Later |
Starter Kit vs. Buying Separately
Starter kits are a reasonable shortcut if you want to make one or two candles without sourcing anything individually. Most kits include wax, a few wicks, a small amount of fragrance, and basic instructions. For a first experiment, that's fine.
The limitation is wax. Kits usually include small quantities of a generic wax blend, and you won't know what it is or how it's formulated. If you want to get serious about your candles, buying wax separately from a dedicated candle supply company gives you full specifications: melt point, fragrance load capacity, pour temperature, and performance notes. That information makes troubleshooting much easier.
A middle path: buy a kit for your very first batch, then order your wax, wicks, and fragrance separately once you know you enjoy the process. For a clearer picture of what all this costs to get started, how much does it cost to start making candles breaks down typical beginner spend.
Your Starter Shopping List
Print this and take it to your supplier:
- Soy container wax (10 lbs to start)
- Tabbed cotton wicks (wick sampler sized for your container diameter)
- Glass jars (6–8 to start; 8 oz straight-sided mason jars work well)
- Fragrance oil (2–3 scents, 2 oz each)
- Digital kitchen scale (up to 5 kg, 1 g precision)
- Candy or digital probe thermometer
- Candle melting pitcher with pour spout
- Wick stickers (pack of 100)
- Wick bar or a pair of chopsticks
That's it. Total cost varies by brand and supplier, but this list typically runs $50–$90 for the first batch. You'll use most of these tools indefinitely; the consumables are wax, wicks, and fragrance. Once you're ready to pour, how to make candles at home: a complete beginner's guide walks through the full process step by step.
Frequently Asked Questions
Can I use a regular pot instead of a melting pitcher?
You can use a heat-safe metal or glass pitcher inside a larger pot of water as a double boiler, yes. The key is indirect heat. Do not melt wax in a pot sitting directly on a burner. Wax is flammable above its flashpoint, and direct heat makes temperature control much harder. A purpose-made candle pitcher with a spout makes pouring easier and keeps dedicated candle equipment separate from your cooking tools.
What size wick do I need?
Wick size depends on the diameter of your container and the type of wax you're using. There is no universal answer. Most wax suppliers provide a wick guide matched to their specific wax, and many recommend testing two or three wick sizes per container before committing to a production batch. A wick too small causes tunneling; a wick too large creates an oversized flame and excessive soot.
Is soy wax better than paraffin for beginners?
Soy is more forgiving for beginners because it has a wider pouring window and shows temperature-related problems (sinkholes, frosting) more slowly, giving you more time to adjust. Paraffin can produce candles with excellent scent throw and a cleaner appearance, but it requires more precision. Start with soy, understand the basics, and try paraffin later if you want to compare.
Do I need special fragrance oil, or can I use essential oils?
Candle-specific fragrance oils are formulated for high-heat environments and are generally the better choice for beginners. Many essential oils have low flashpoints (the temperature at which the oil becomes flammable vapor), which creates safety concerns when added to hot wax. Essential oils are also more expensive per ounce and often fade faster in a finished candle. Fragrance oils are the practical starting point.
How do I know if my candle turned out right?
Do a burn test. Light the candle, let it burn for 3–4 hours on the first use, and check: Is the melt pool reaching the edges of the container? (Good.) Is the flame steady and under 1 inch tall? (Good.) Is there black soot on the jar or wick mushrooming into a large ball? (Wick is too big.) Tunneling down the center with unmelted wax on the sides? (Wick is too small or you didn't let it burn long enough on the first use.) Most first batches need at least one wick adjustment. That's normal.