Pouring & Technique
How to Pour a Soy Candle Step by Step
Learn how to pour a soy candle from scratch: weigh wax, set your wick, melt, add fragrance, and pour at the right temperature for a clean, even finish.
Pouring your first soy candle takes about two hours from setup to finished jar, and most of that time is just waiting. The steps are straightforward once you understand why temperature matters at each stage. Get that right, and you'll have a smooth-topped, well-scented candle that burns cleanly from the first light.
This guide walks through every step in order, with temperatures in both Fahrenheit and Celsius so you're not doing math mid-pour.
What You'll Need Before You Start
Having everything within arm's reach before you turn on the heat makes the whole process calmer.
Equipment:
- Double boiler or a pouring pitcher set in a pot of water
- Kitchen scale (a must, everything is measured by weight)
- Candy or candle thermometer
- Wooden spoon or silicone spatula for stirring
- Heat-resistant pouring pitcher (stainless steel or dedicated candle pitcher)
- Glass or metal container for your candle
- Wick centered with a wick bar, pencil, or chopstick resting across the jar opening
- Wick stickers or a small dab of hot glue to anchor the wick tab to the jar bottom
Materials:
- Soy wax flakes (container soy wax, such as Golden Brands 464 or similar)
- Candle fragrance oil or essential oil rated for candles
- Liquid candle dye (optional)
- Pre-tabbed cotton or wood wick sized for your container diameter
The general ratio: 1 oz of fragrance oil per 1 lb of wax (6% fragrance load) is a safe starting point for soy. You can go up to 10% max load, but always check your wax manufacturer's spec sheet.
Step 1: Weigh Your Wax and Fragrance
Never measure by volume. Candle wax is fluffy and inconsistent when scooped into a cup. A kitchen scale gives you repeatable results.
A common rule of thumb: weigh the empty jar, then fill it with water and weigh it again. The weight of the water (in ounces) equals roughly the weight of wax you'll need to fill it. Discard the water, dry the jar completely, and you have your target wax weight.
For fragrance: multiply your wax weight (in ounces) by your desired fragrance load percentage.
Example:
- Jar holds 8 oz of wax
- 6% fragrance load: 8 × 0.06 = 0.48 oz fragrance oil
Pre-weigh the fragrance oil into a small cup and set it aside. You'll add it at a specific temperature, so having it ready prevents scrambling at the wrong moment.
Step 2: Set Up Your Wick
Do this before you start melting wax. Trying to center a wick in hot liquid wax is frustrating and inaccurate.
- Stick the metal wick tab to the center of the jar bottom using a wick sticker or a tiny dot of hot glue.
- Pull the wick straight up through your wick bar (a wooden bar with a notch, or simply a pencil taped across the jar opening).
- Keep the wick taut so it sits perfectly vertical.
A wick that drifts off-center will cause uneven burning and tunneling. Two minutes here saves a ruined candle.
Step 3: Melt the Wax
Place your soy wax flakes in the pouring pitcher. Set the pitcher in a pot of water (double boiler method) over medium heat. Never melt wax directly on a burner, it's a fire hazard, and soy wax has a flash point around 300°F (149°C) that you never want to approach.
Stay nearby. Wax doesn't need constant stirring, but it should never be left unattended on heat.
Stir occasionally as the flakes melt. Watch the thermometer.
Target melt temp: Most container soy waxes are fully liquid by 170–180°F (77–82°C). You don't need to go higher. Some makers heat to 185°F briefly to make sure all solids dissolve, which is fine as long as you monitor it.
Step 4: Add Dye (Optional)
If you're coloring your candle, add liquid dye once the wax is fully melted and between 170–180°F (77–82°C). Start with 1–2 drops, stir thoroughly, and check the color by dripping a small amount onto white paper (color appears darker in the jar and lightens significantly when cooled).
Dye chips also work, shave off a small amount with a knife and stir until dissolved.
Skip dye entirely if you want a natural off-white look, which is the natural color of soy wax.
Step 5: Add Fragrance Oil at the Right Temperature
This is the most important temperature moment in the whole process.
Add fragrance at 185°F / 85°C, then stir continuously for 2 full minutes.
Why this specific temperature? Fragrance oil needs to be warm enough to fully bind with the wax molecules, but not so hot that volatile top notes evaporate off before the wax sets. Adding fragrance to wax that's too cool (below 160°F/71°C) can cause the scent to separate or create a murky, streaked appearance in the jar.
Pour your pre-weighed fragrance oil into the melted wax in a steady stream while stirring. Set a timer for 2 minutes and stir constantly. This isn't about mixing speed, slow, thorough stirring from the bottom of the pitcher works well.
After 2 minutes, your wax should look uniformly clear or lightly opaque (depending on the wax).
Step 6: Cool Down to Pour Temperature
Remove the pitcher from the heat and let the wax cool. This step requires patience.
Target pour temperature for container soy wax: 135–145°F / 57–63°C
Check your specific wax's data sheet for its recommended pour temp, since formulas vary. Some waxes pour best at the lower end of this range for a smoother top; others perform better slightly warmer.
Keep the thermometer in the pitcher and check every few minutes. Stir gently once or twice as it cools to keep the fragrance evenly distributed and prevent a skin forming on the surface.
Pouring too hot (above 150°F/65°C) causes excessive shrinkage as the wax cools, leaving a sunken or pitted top. Pouring too cold (below 130°F/54°C) can trap air bubbles and leave a rough, mottled surface. The window is narrow, which is why a thermometer isn't optional.
For more on the science behind this, see Candle Pouring Temperature: A Beginner's Guide.
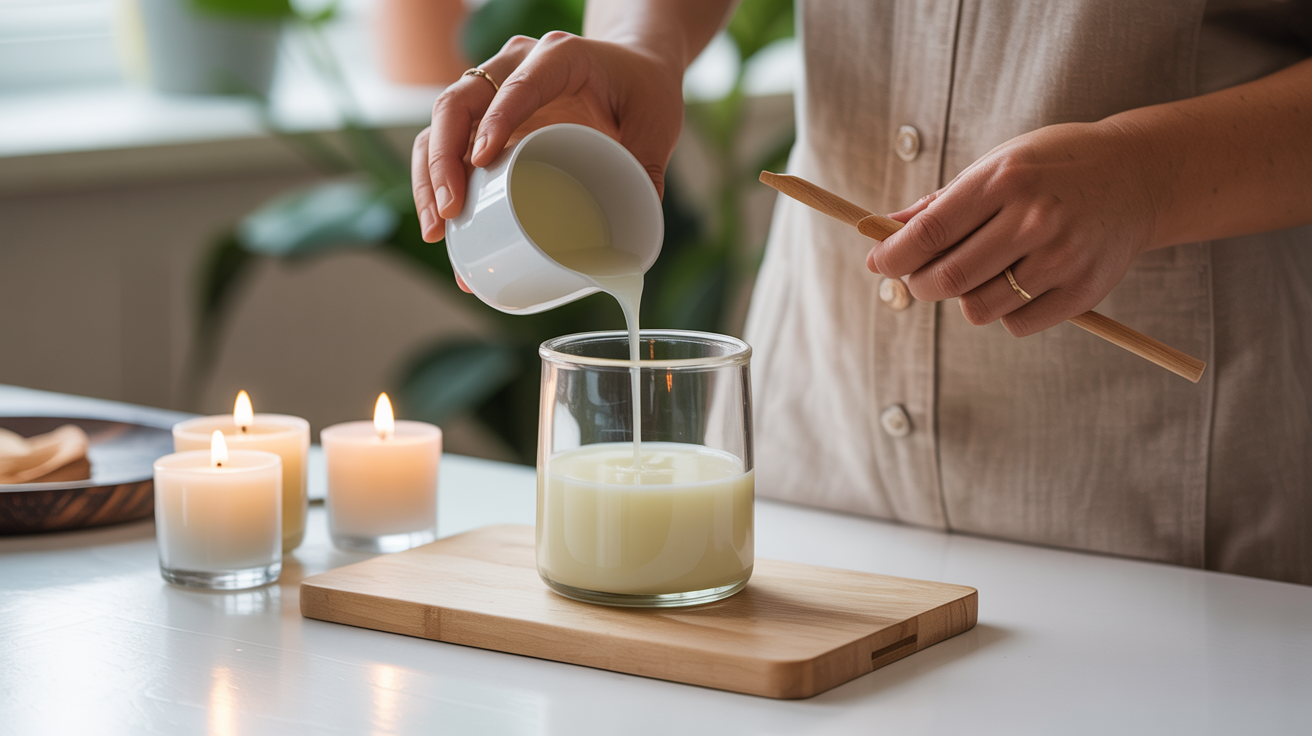
Step 7: Pour the Wax
When the wax hits your target range, pour slowly and steadily into your prepared jar. Hold the pitcher close to the jar opening to minimize air bubbles. Fill to about 1/2 inch (1.2 cm) below the jar rim.
Tips for a cleaner pour:
- Pour in one continuous motion rather than stopping and starting, which can create fill lines on the inside of the glass.
- If your fragrance oil is dark, the wax may look slightly amber or brown in the jar. This is normal and will lighten as it cools.
- Don't disturb the jar after pouring. Place it on a flat surface away from drafts, air vents, or open windows. Moving air causes uneven cooling and a bumpy top.
Check that your wick is still centered after the pour. Adjust gently if needed while the wax is still liquid.
Step 8: Let It Set and Top Up If Needed
Setting time: Soy wax typically reaches room temperature and appears solid within 4–6 hours, but the full cool-down and crystallization takes longer.
As soy wax cools, it contracts. This often leaves a slight sinkhole or depression around the wick, especially in the center. This is normal, not a defect.
Top-up pour: Once your candle looks fully set but still shows a sinkhole, do a second small pour to fill it. Heat a small amount of the same wax (with fragrance, same ratio) to about 5°F warmer than your first pour temperature, and add just enough to level the surface. One top-up is usually enough.
For tips on getting a perfectly flat, glassy top, see How to Get a Smooth Candle Top.
Step 9: Cure the Candle
The candle looks done. It is not done.
Soy candles need a cure period for the fragrance to fully bond with the wax and for the wax structure to stabilize. A candle burned too soon will have a weak scent throw and may tunnel.
Minimum cure time: 48 hours before burning. Recommended: 1–2 weeks for the best scent performance.
Place the candle in a room-temperature spot away from direct sunlight (UV degrades fragrance and can cause discoloration in soy wax). You can cover it loosely with a cloth or paper to keep dust off while it cures.
After curing, trim the wick to 1/4 inch (6mm) before the first burn. This prevents a large flame, reduces soot, and helps the candle burn more evenly.
For a full explanation of why the cure period matters, see How to Cure Candles and Why It Matters.
Full Step-by-Step Reference (with Temperatures)
Here's the complete process in one numbered list for quick reference:
- Weigh empty jar, then fill with water and weigh again to determine wax weight needed.
- Pre-weigh fragrance oil (6% of wax weight is a standard starting load).
- Anchor the wick tab to the jar bottom; secure wick upright with a wick bar.
- Melt soy wax flakes in a double boiler to 170–185°F / 77–85°C, stirring occasionally.
- Add liquid dye at 170–180°F / 77–82°C if using color; stir until uniform.
- Add fragrance oil at 185°F / 85°C; stir continuously for 2 minutes.
- Remove from heat; cool wax to 135–145°F / 57–63°C, stirring gently once or twice.
- Pour steadily into the prepared jar; stop 1/2 inch below the rim.
- Re-center wick if needed; set jar on a flat, draft-free surface.
- After 4–6 hours, assess the top. Do a small top-up pour if there's a sinkhole.
- Cure for 1–2 weeks at room temperature before burning.
- Trim wick to 1/4 inch before the first light.
Frequently Asked Questions
Why did my candle top crack or look rough after cooling?
Soy wax is prone to "frosting," a white, matte, or bumpy appearance caused by the natural crystallization of vegetable wax. It's a cosmetic issue, not a structural one, and it doesn't affect burn quality or scent throw. Pouring at a slightly higher temperature (toward the upper end of your pour range) and keeping the candle in a warm room during the initial set can reduce it, but some amount of frosting is inherent to natural soy wax.
Cracking is different, it usually means the candle cooled too fast (a cold room or draft). Try pouring into jars that have been slightly warmed, or set the candle to cure in a warmer spot.
My candle has a strong smell in the jar but almost no scent when burning. What went wrong?
A few common causes: the candle wasn't cured long enough (fragrance needs time to bind with the wax), the wick is too small for the container diameter (not creating a full melt pool), or the fragrance load was too low. Try a 1–2 week cure before making changes. If the problem persists, move up one wick size and retest.
Can I use essential oils instead of fragrance oils?
Yes, but with some caveats. Many essential oils have lower flash points and higher volatility than synthetic fragrance oils, which means the scent can burn off quickly during the melt-and-pour process. Add essential oils at the lower end of the fragrance window (around 175–180°F / 79–82°C) and stir thoroughly. You may also need a higher usage rate to achieve the same scent throw. Some essential oils (citrus especially) simply don't perform well in wax; others, like eucalyptus and lavender, work reliably.
How do I know if I'm using the right wick size?
The wick should create a full melt pool (wax liquefied from edge to edge of the container) within 2–3 hours of burning. If the melt pool stays narrow and tunnels down the center, the wick is too small. If the flame is large and flickering and the jar gets very hot, the wick may be too large. Wick sizing is specific to your container diameter, wax type, and fragrance load, so expect to test 2–3 wick sizes before landing on the right one.
Is there a minimum or maximum pour temperature I should never cross?
As a hard floor: don't pour below 125°F / 52°C, at that point the wax is starting to set in the pitcher, and you'll get a lumpy, air-trapped candle. As a ceiling: don't add fragrance above 200°F / 93°C, and don't pour above 160°F / 71°C for container soy wax. High pour temps cause significant shrinkage, weak adhesion to jar walls, and increased sink holes. For some parasoy blends the guidelines shift, so always check the spec sheet for your specific wax.