Projects & Scents
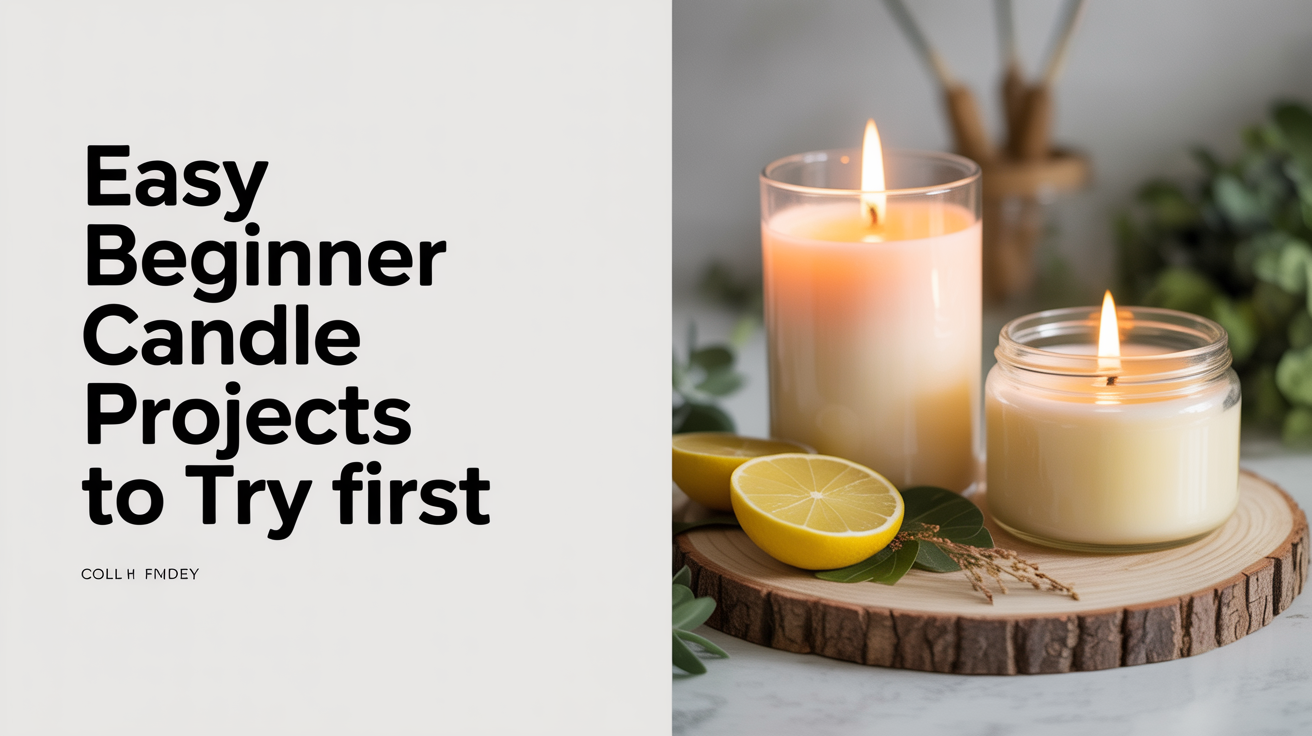
Easy Beginner Candle Projects to Try First
Five simple candle projects perfect for beginners — from melt-and-pour mason jars to wood-wick soy candles. Step-by-step with temps, safety tips, and supplies.
The first candle you make is the one that teaches you the most. Start with something forgiving, finish with a product you'll actually burn, and build from there. These five projects are arranged from simplest to slightly more involved, so you can work through them in order or jump to whatever sounds most interesting.
Before anything else: hot wax is a burn hazard. Keep a fire extinguisher nearby, never leave melting wax unattended, and use a dedicated double boiler or wax melter rather than a direct flame. Kids can participate, but an adult should always handle the hot wax.
Quick-Reference: Which Project to Start With
| Project | Difficulty | What You'll Learn |
|---|---|---|
| Melt-and-pour mason jar | Beginner | Basic candle anatomy, fragrance loading |
| Soy container candle | Beginner–Easy | Wax temperatures, wick sizing |
| Teacup/upcycled vessel | Easy | Vessel prep, centering wicks |
| Travel tin | Easy | Small-batch pours, lid compatibility |
| Wood-wick candle | Easy–Intermediate | Wick trimming, crackling burn behavior |
Project 1: Melt-and-Pour Mason Jar Candle
This is the most beginner-friendly candle you can make, and a genuinely good place to start. Melt-and-pour wax comes pre-blended and pre-additized. You don't need to worry about cure time, additives, or temperature windows, melt it, scent it, pour it.
Why It's a Good First Project
Melt-and-pour forgives mistakes. If you pour too hot or add fragrance unevenly, the wax re-melts easily. You'll also learn the basic structure of every candle you ever make: container, wick, wax, fragrance.
What You'll Need
- 1 lb melt-and-pour candle wax (clear or opaque, both work)
- 8 oz wide-mouth mason jar
- Pre-tabbed cotton wick (sized for the jar's diameter, check the supplier's wick chart)
- 0.5–1 oz candle-safe fragrance oil
- Double boiler or microwave-safe pitcher
- Thermometer
- Chopstick or pencil to hold the wick centered
How to Make It
- Melt the wax in your double boiler until fully liquid. Target 160–175°F (71–79°C).
- Remove from heat. Let it cool to 140–150°F (60–65°C) before adding fragrance. Adding scent to wax that's too hot burns off the top notes.
- Stir fragrance in slowly for 60–90 seconds.
- Place the pre-tabbed wick in the center of the jar. Rest the wick stick (or a chopstick) across the jar rim to keep it upright.
- Pour the wax carefully. Leave about half an inch of space at the top.
- Let it cool completely at room temperature. This takes 4–6 hours. Don't move it or the wick will shift.
- Trim the wick to 1/4 inch (6 mm) before the first burn.
The jar is reusable once the candle is spent. Boil out the remaining wax, wash with dish soap, and you have a sturdy container back.
Project 2: Basic Soy Container Candle
Once you've done a melt-and-pour, soy wax is the natural next step. It's made from soybeans, burns cleaner than paraffin, and is widely available. The main difference from melt-and-pour: soy requires more attention to temperature and benefits from a 48-hour cure before the first burn.
For a deeper look at the full soy process, see how to make scented soy candles in jars.
Why Soy Works Well for Beginners
Soy is slow to set, which means you have time to adjust the wick before it locks in place. It also tends to have good scent throw and looks attractive in glass containers.
What You'll Need
- Soy container wax flakes (e.g., Golden Brands 464 or similar)
- 8 oz glass jar
- Cotton wick rated for the jar's diameter
- Candle-safe fragrance oil (fragrance load for soy is typically 6–10% by weight)
- Kitchen scale (weight measurements are more reliable than volume for wax)
- Thermometer
How to Make It
- Weigh your wax. An 8 oz jar holds roughly 6 oz of wax by weight.
- Melt soy flakes to 175–185°F (79–85°C).
- Remove from heat. Cool to 160–170°F (71–77°C), then stir in your fragrance oil. Soy absorbs fragrance best at this range.
- Cool further to 135–140°F (57–60°C) before pouring. Cooler pours reduce sinkholes in the finished surface.
- Pour slowly into the prepared jar with the wick centered.
- Let cool 24 hours. You may see a small sinkhole form around the wick as soy contracts. Do a second "top-off" pour with a small amount of remelted wax.
- Cure 48 hours minimum before burning. The scent throw improves noticeably with curing time.
Project 3: Teacup or Upcycled-Vessel Candle
Any heat-safe vessel can become a candle. Vintage teacups, small ramekins, ceramic bowls, or enamel cups all work. The catch: the vessel must be genuinely heat-safe. Thin glass, crystal, and decorative pottery with hairline cracks can shatter under sustained heat.
Test before committing: fill the vessel with boiling water and let it sit for five minutes. If it survives, it can likely handle candle heat.
Why It's Worth Making
Upcycled candles make thoughtful gifts and cost almost nothing when you source the vessels from thrift stores. The project also teaches you to prep irregular-sized containers without a pre-sized wick guide.
What You'll Need
- Heat-safe cup or vessel (roughly 6–10 oz capacity)
- Soy or paraffin blend wax (matched to the vessel's volume)
- Pre-tabbed wick, use the vessel's widest internal diameter to select the right size
- Fragrance oil
- Low-temperature hot glue or wick sticker to anchor the wick tab to the vessel bottom
How to Make It
- Clean the vessel thoroughly. Any residue can affect adhesion.
- Glue the wick tab to the center of the vessel bottom. Let it set fully before pouring.
- Melt and scent your wax using the same temperature guidelines as Project 2.
- Pour carefully. Teacup handles can make this awkward, use a pouring pitcher with a narrow spout.
- Allow to cool. Teacups with thick walls may take longer because the ceramic retains heat.
- Trim the wick. The finished candle is ready to burn after a 48-hour cure.
Keep the burning candle on a heat-safe surface. Ceramic vessels conduct heat to their base more than glass does.
Project 4: Travel Tin Candle
Tins are practical for beginners because they're affordable, stackable, and the lids protect the surface during storage. They're also your first encounter with container sizing: a 4 oz tin needs a different wick than an 8 oz jar, and they tend to burn hotter because metal conducts heat.
Why Tins Are Useful to Learn
Small-batch pours let you test a fragrance or a color before committing to a large pour. If a wick size is wrong in a tin, you've lost maybe $2 in wax rather than $8 in a big jar.
What You'll Need
- 4 oz metal tin with lid
- Paraffin or soy wax appropriate for container use (not pillar wax)
- Cotton wick rated for 2–2.5 inch diameter
- Fragrance oil
- Optional: candle dye chips or liquid dye (tins hide the wax color anyway, so this is optional)
How to Make It
- Anchor the wick tab to the tin's center bottom with a wick sticker.
- Melt wax to the recommended temperature for your wax type.
- Add fragrance and any dye at the appropriate temperature.
- Pour at the lower end of your wax's pour range to minimize shrinkage.
- Let the tin cool with the lid off so condensation doesn't form on the inside of the lid.
- Once fully set, cap the tin and label it with the fragrance name and pour date.
Tins are great for testing new fragrance blends. If you're unsure how two scents work together, see how to blend candle fragrances like a pro before committing to a large batch.
Project 5: Simple Wood-Wick Candle
Wood wicks are the most satisfying candle to burn. They crackle like a small fireplace, which is most of the reason anyone buys them. They're also slightly trickier than cotton wicks because they're more sensitive to proper trimming and wax type.
Do this project after you're comfortable with temperature control. It's still very beginner-accessible, but a poorly trimmed wood wick is the most common reason this type of candle disappoints.
Why It's Worth the Extra Effort
Beyond the crackling sound, wood wicks tend to have a wider "melt pool" (the liquid wax that forms on the surface while burning), which can improve scent throw. They also look distinctive in a finished candle.
What You'll Need
- 8 oz glass jar or ceramic vessel
- Wood wick with metal clip tab (sold as a set; match the wick's "height" to your jar's diameter)
- Soy or coconut wax (wood wicks work better in softer waxes, avoid hard paraffin blends)
- Fragrance oil with fragrance load calculated by weight
- Wood wick holder bar (a simple wooden or metal bar that sits across the jar to hold the wick upright)
How to Make It
- Clip the wood wick into its metal tab and seat the tab in the center of the jar bottom. A small dab of wax or wick sticker holds it.
- Melt soy or coconut wax to 175–185°F (79–85°C).
- Cool to 160–170°F (71–77°C) and stir in fragrance.
- Cool to 130–140°F (54–60°C) and pour.
- Let cure 48 hours. Don't rush this step with wood wicks, the first burn matters more here.
- Before the first burn, trim the wick to 3/16 inch (about 5 mm). If the flame doesn't hold steady after 5 minutes, extinguish it, let the wax resolidify, and trim slightly shorter. Relighting a properly trimmed wood wick almost always fixes a struggling flame.
For seasonal fragrance ideas that pair well with wood-wick candles, seasonal candle scent ideas for every time of year has a full breakdown by season and mood.
Frequently Asked Questions
What is the easiest type of candle for a complete beginner?
Melt-and-pour candles are the easiest. The wax is pre-blended and requires no additives or lengthy curing. You melt it, add fragrance, pour it, and you're done. Soy container candles are a close second and the better choice if you want to sell or give the candles as gifts.
Do I need a thermometer to make candles?
Yes. Wax temperatures affect how fragrance binds, whether you get sinkholes, and how smoothly the surface sets. A basic digital kitchen thermometer (under $15) works fine. Don't pour by guesswork, especially for your first few batches.
Can I use any fragrance oil, or does it need to be candle-safe?
It needs to be candle-safe. Fragrance oils formulated for candles have a flash point high enough to be safe in hot wax. Essential oils generally have lower flash points and can be flammable at candle temperatures, use them only if the supplier confirms they're candle-safe at your specific usage rate.
How do I know if my wick is the right size?
Burn the candle for one hour and look at the melt pool. It should reach the edges of the container but not be deeper than about 1/2 inch. A melt pool that doesn't reach the edges means the wick is too small; a very deep melt pool with a large, flickering flame means it's too large. Wick sizing is the most trial-and-error part of candle making, so pour small test batches before committing to a big run.
My first candle has a rough, lumpy top. Did I do something wrong?
Probably not. Soy wax especially tends to develop an uneven surface, sometimes called "frosting." It doesn't affect burn quality at all. A second pour of a thin layer of warm wax smooths the surface. Some makers embrace the texture as natural and handmade-looking. Your second and third batches will look cleaner as you dial in your pour temperature.