Projects & Scents
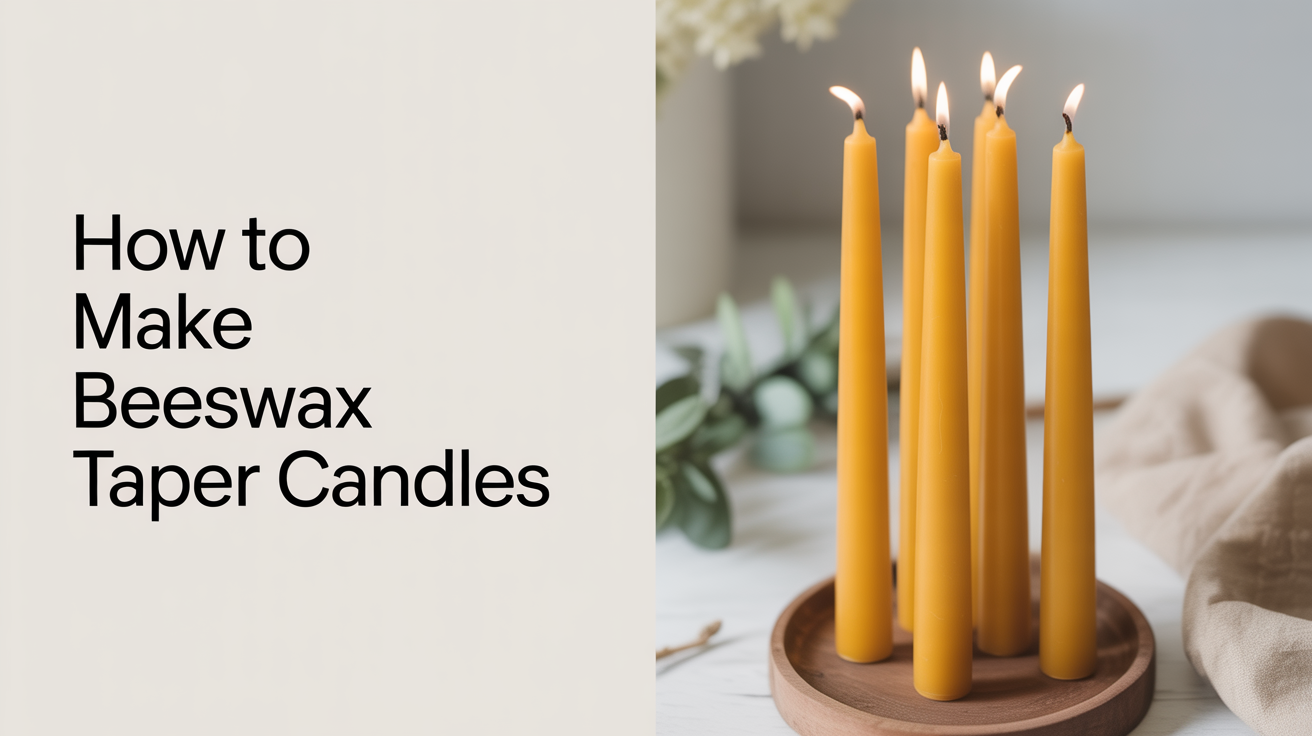
How to Make Beeswax Taper Candles
Learn how to make beeswax taper candles at home with a simple dipping method. Includes temps, wicking tips, and safety guidance for beginners.
Taper candles have been made by hand for centuries, and the basic method has barely changed. You melt beeswax, dip a wick, let it cool, and repeat until the taper reaches the thickness you want. There are no molds to fill, no sink holes to worry about, and no pouring temperature to obsess over in the same way you would with a container candle. What you do need is patience, because a good taper takes twenty or more dips to build up.
Beeswax is a natural fit for tapers. It burns cleanly, holds its shape in warm rooms better than paraffin, and carries a faint honey scent on its own. If you want to understand more about why crafters choose it (and where it can be tricky), read through our beeswax overview before you start. This guide walks you through the dipping process from setup to finished candle.
What You Need
You do not need a lot of equipment, but a few items are non-negotiable.
Beeswax. Yellow beeswax is the traditional choice and gives tapers a warm, natural color. Filtered white beeswax is also fine if you prefer a lighter look or plan to add a small amount of dye. Buy from a candle-supply shop rather than a craft store; purity matters for even dipping. Plan on roughly one pound of wax per pair of 10-inch tapers, though you will need far more wax in the pot than you actually use, since the wick needs full submersion.
A tall, narrow dipping vessel. A tall can, a PVC pipe capped at one end, or a dedicated dipping vat works well. The container needs to be at least two inches taller than your finished taper length and narrow enough that you are not heating a huge volume of wax you will never use. A quart-sized cylindrical container is a good starting point for 8 to 10 inch tapers.
Wicking. Square-braided cotton wick is the standard choice for beeswax tapers. Beeswax is a harder, denser fuel than paraffin, so it needs a slightly larger wick than you might expect. A #2/0 or #3 square-braid is a common starting point for a standard dinner-taper diameter. For more on wick options and how sizing works, see our guide to wick types.
A thermometer. Dipping temperature is the one variable you control most directly, and getting it right makes the difference between a smooth taper and a lumpy one.
A cooling rack or dowel rod. You need somewhere to hang pairs of tapers between dips. A wooden dowel laid across two chairs, or a simple wire rack, works fine.
Safety supplies. A kitchen thermometer or infrared gun, a metal lid that fits over your dipping vessel (to smother a wax fire if one starts), and a clear workspace away from water are the basics. Beeswax has a flash point well above dipping temperature, but you should still treat melted wax like hot oil: no water near it, no leaving it unattended on heat.
Preparing Your Wax and Wick
Cut your wick to twice the length of your planned taper, plus about four inches. If you want two 10-inch tapers that share one long wick, cut a piece roughly 24 inches long. This lets you hold one end, dip the loop, and end up with a matched pair that you can separate at the bottom once they are finished.
Stiffen the wick before your first dip by running it through hot wax and then pulling it straight. Lay it on a sheet of parchment and stretch it as it cools. A limp, curling wick is harder to dip straight and can result in a crooked candle.
Melt your beeswax in a double boiler setup, never directly over a burner. A larger pot of water with your dipping vessel sitting inside it gives you gentle, even heat and reduces the risk of scorching. Bring the wax to your target dipping temperature: 160 to 170 degrees Fahrenheit (71 to 77 degrees Celsius) is the working range for most hand-dipped beeswax tapers. At the lower end of that range, each dip adds a slightly thicker layer; at the higher end, layers are thinner and build more slowly but tend to look smoother.
Check your temperature with a thermometer before each set of dips, especially as you get into a rhythm. The wax cools as you work, and a pot that has dropped to 150 F (65 C) will leave drag marks and ridges.
The Dipping Process
Hold the center of your pre-waxed wick and lower both ends into the wax smoothly, keeping the pair parallel. Submerge them for two to three seconds, then lift straight up at a steady pace. Pull too fast and you get air bubbles; pull too slow and the wax already on the taper begins to melt back off.
Hang the pair over your dowel or rack and let them cool until the surface is firm and no longer tacky. In a room at about 68 F (20 C), this takes one to two minutes per dip. Do not rush it by dunking them in cold water; that can cause cracking or a cloudy surface.
Repeat the dip-and-cool cycle. In the early dips, the tapers build quickly and may look uneven. They smooth out as you add more layers. By around the tenth dip, you will have a recognizable taper shape. Most makers aim for 20 to 30 dips total to reach a standard dinner-taper diameter of about three-quarters of an inch at the base.
If your tapers develop ridges or lumps, warm your dipping wax back up by a few degrees and do a slow, deliberate dip. The slightly warmer wax will melt down surface irregularities. You can also smooth small bumps with a warm hand after a dip, before the wax sets completely.
Finishing and Trimming
Once your tapers reach the thickness you want, let them hang and cool fully, at least 30 minutes and ideally an hour. Beeswax contracts slightly as it cures, so the final shape firms up a little more than it looks right after the last dip.
Trim the bottoms flat with a sharp knife so the tapers stand level in a holder. A candle-taper holder typically accepts a base diameter of 7/8 inch; use calipers or a simple go/no-go hole test if you want to be precise. Trim the wick at the top to about one-quarter inch before the first burn.
Store finished tapers laid flat or hanging upright in a cool, dark place. Beeswax can bloom (develop a white haze on the surface) when stored in fluctuating temperatures. This is cosmetic and does not affect burn quality; buff it off with a soft cloth or a warm hand.
For more on temperature control during any wax project, the principles in our pouring temperature guide carry over to dipping work even though the technique is different.
Frequently Asked Questions
How long does it take to make a pair of beeswax taper candles? Plan on 60 to 90 minutes for a pair of standard 10-inch tapers, including melt time and the cooling intervals between dips. The actual hands-on time per dip is only a few seconds, but the waiting adds up. Many makers dip two or three pairs at once in rotation so they always have something to work on while the others cool.
Can I add fragrance to beeswax tapers? You can, but it is tricky. Beeswax does not hold fragrance oil the way softer container waxes do, and high fragrance loads can cause sweating or affect burn quality. If you want a scented taper, use fragrance oils rated for beeswax and keep the load under 3 percent. Many crafters prefer to let beeswax's natural honey scent do the work and skip added fragrance entirely.
Why are my tapers lumpy or uneven? The two most common causes are wax that is too cool (below 155 F / 68 C), which deposits thick uneven layers, and pulling the wick out too quickly. Check your temperature before each set of dips and slow down your pull. A smooth, steady three-second lift produces the most consistent results.
What size wick should I use for a 3/4-inch diameter taper? A #2/0 or #3 square-braided cotton wick is a reliable starting point for a standard taper at that diameter. Beeswax burns cooler than paraffin so it often needs a wick one size larger than you might expect. Always burn-test a finished taper before giving them as gifts: you want a full melt pool at the rim by the one-hour mark without mushrooming or excessive dripping.
Do beeswax tapers drip more than paraffin? Beeswax tapers generally drip less than paraffin, which is one reason they are popular for formal table settings. That said, a draft from an open window or a slightly crooked taper in a holder can cause any candle to drip. Keep tapers away from air currents and make sure they sit perfectly vertical in the holder to minimize dripping.