Wax & Materials
Beeswax Candles: Pros, Cons, and How to Work With Beeswax
Learn the real pros and cons of beeswax candles, how to melt and wick them safely, and which beginner projects work best with this natural wax.
Beeswax is the oldest candle-making material on earth, and it still earns its reputation. It burns clean, smells faintly of honey straight out of the hive, and holds its shape better than almost any other wax. It also costs significantly more, melts hotter than most beginner-friendly waxes, and fights fragrance additions almost the whole way. Whether you buy a block or a bag of pellets, knowing what you're getting into saves frustration and money.
The Pros of Beeswax Candles
It Burns Longer Than Most Waxes
Beeswax is dense. That density translates directly into burn time. A beeswax pillar will typically outlast a paraffin candle of the same size by 30 to 50 percent. For pillar or taper candles that sit in prominent spots, that longer life justifies a higher price per ounce for many makers.
The Natural Scent Is a Feature, Not a Bug
Pure beeswax has a light, warm honey scent that comes from the wax itself, not from added fragrance. It's subtle. If you're making candles for people who are sensitive to synthetic fragrances, unscented beeswax is genuinely appealing. The scent doesn't linger the way perfumed candles do; it's more of a background warmth while the candle burns.
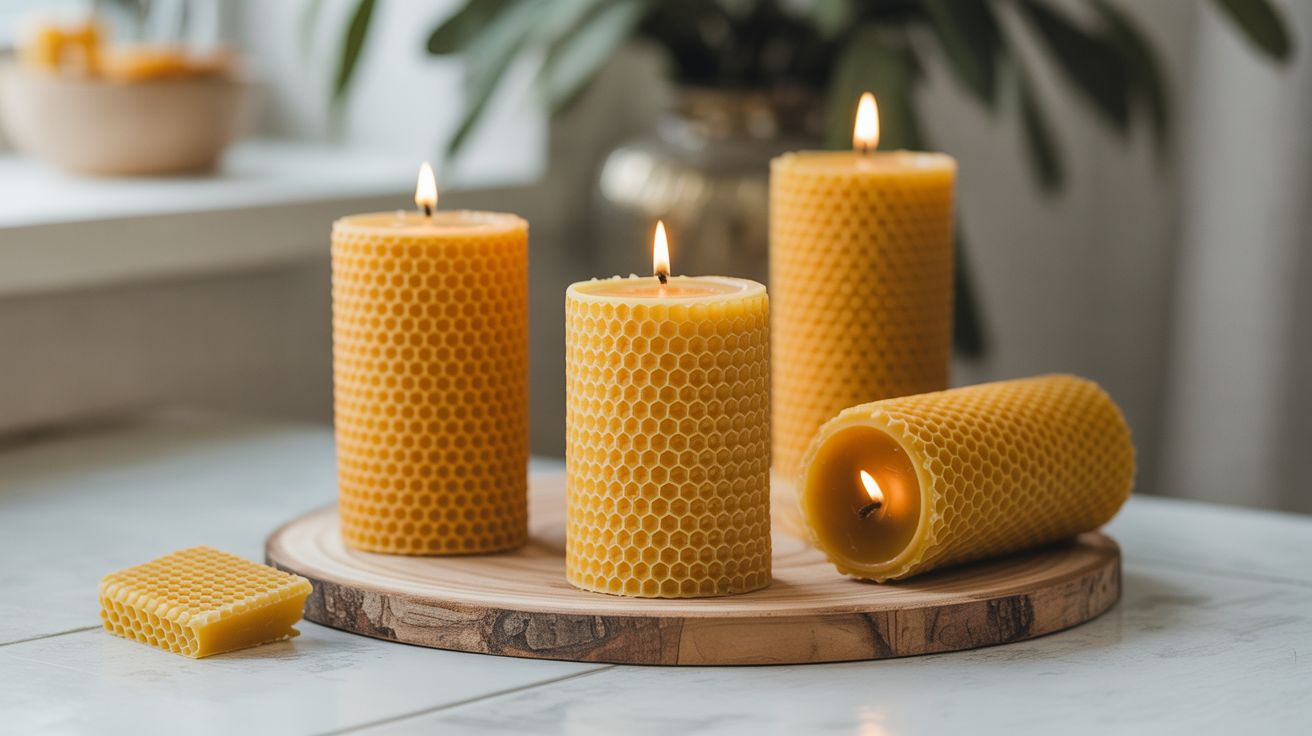
Rigid Enough for Freestanding Candles
Beeswax has a naturally high melting point (more on that in a moment) and a firm structure at room temperature. Pillars, votives, tapers, and carved candles all hold their shape reliably. You don't need additives to stiffen the wax the way you might with soy.
Rolled Beeswax Sheets Require No Melting At All
This is the biggest beginner win. Beeswax sheets — thin, pliable sheets of honeycomb-textured wax sold in craft stores — can be rolled around a wick at room temperature. No double boiler, no thermometer, no hot wax hazards. You cut a wick, lay it along one edge of a sheet, and roll. A basic taper takes about five minutes. This makes beeswax sheets the single easiest candle project for a true beginner.
The Cons of Beeswax Candles
The Price Is Real
Beeswax costs three to five times more per pound than paraffin, and noticeably more than soy. If you're planning a large batch or testing lots of wick sizes, the cost adds up fast. Many makers use beeswax only for their best products, or mix it with another wax to moderate the price while keeping some of the burn benefits.
The Melt Point Is High, and That Matters for Safety
Beeswax melts between roughly 145 and 170°F (63 to 77°C), depending on purity and processing. Compare that to soy wax, which melts around 120 to 125°F (49 to 52°C). That extra heat means longer warm-up time, more attention required at the stove, and a higher risk of burns if something splashes. You need a thermometer, a reliable double boiler or dedicated melting pot, and patience. Never melt beeswax directly on a burner without a water bath underneath.
Fragrance Throw Is Limited
Beeswax doesn't absorb fragrance oil the way paraffin does. Its molecular structure makes it harder for scent molecules to bind. You can add fragrance, but the typical recommendation is to add it at a relatively low temperature (around 160°F/71°C for most beeswax) right before pouring, and even then the hot and cold throw will be weaker than the same fragrance in paraffin or coconut wax. If strong scent throw is your main goal, beeswax probably isn't your best match. You can read more about how waxes compare in our guide to types of candle wax explained for beginners.
Cleanup Is Harder
Beeswax sticks stubbornly to pots, spoons, and surfaces. Because it solidifies quickly and clings, you'll spend more time with paper towels, scraping, and hot water than with most other waxes. Keeping dedicated beeswax tools separate from your other candle equipment makes life easier.
Beeswax Forms and Which to Use
| Form | Description | Best For |
|---|---|---|
| Pellets | Small beads, easy to measure and melt | Poured candles, blends |
| Blocks | Solid slabs, often raw/unrefined | Pillar candles, large batches |
| Sheets | Pre-pressed honeycomb sheets | Rolled tapers, no-melt projects |
| Pastilles | Similar to pellets, slightly larger | Poured candles, blending |
Pellets are the most beginner-friendly form for poured candles. They melt evenly and you can measure by weight without guessing. Blocks are usually cheaper per pound but require chopping into smaller pieces before melting, which adds time and a cutting hazard. Sheets skip melting entirely, making them ideal for a first candle project.
Yellow beeswax is minimally filtered and retains the natural honey color and scent. White beeswax has been bleached and has a milder scent profile. Neither is better, just different.
Working Temperatures and Technique
Melting Safely
Set up a double boiler: a pot of water on the stove with a smaller heat-safe container (a pouring pitcher or a tin can) sitting in the water. Clip a candy thermometer to the side. Heat water to a low simmer and let it do the work. Beeswax is flammable at high temperatures, so never leave it unattended on direct heat.
Target melt temperature for beeswax is roughly 160 to 170°F (71 to 77°C). Once fully melted, you can bring it down slightly before pouring.
Pouring Temperature
Pour beeswax between 150 and 160°F (65 to 71°C). Pouring too cool causes rough or mottled surfaces. Beeswax tends to crack or pull away from container walls as it cools, especially in glass containers. This is normal and not a sign that anything went wrong.
Pre-warming your molds or containers (with a heat gun or by setting them in a warm spot) reduces cracking and helps adhesion.
Adding Fragrance
If you're adding fragrance, add it at around 160°F (71°C) and stir slowly for two full minutes. Keep fragrance load at 3 to 6 percent by weight. Going above 6 percent often results in fragrance pooling at the top or seeping out of the candle entirely.
Wicking Beeswax Candles
Beeswax's density means it needs a bigger wick than you might expect. A wick that works fine in soy will likely drown in beeswax, producing a small flame, a lot of wax buildup on the jar wall, and poor burn quality.
For container beeswax candles, move up one or two wick sizes from your usual starting point. Square-braided cotton wicks work well with beeswax, and some makers prefer wood wicks for the added heat output. Always wick test before committing to a full batch.
For pillar candles, beeswax typically requires a braided or square wick rather than a cored wick. The Candle Science and Wooden Wick Co. wick guides both include beeswax-specific recommendations worth bookmarking.
Rolled sheet tapers already come with a wick suggestion on the packaging; that guidance is usually accurate, so follow it rather than guessing.
For more detail on wick sizing and selection, the same logic that applies to soy applies here, scaled up. Our soy wax for candles guide covers the baseline principles if you want a comparison starting point.
Best Beginner Projects with Beeswax
Rolled tapers are the true entry point. Buy a sheet pack, a roll of wick, and a ruler. Start there before you touch a thermometer.
Votive or pillar candles are the next step. Beeswax holds its shape beautifully in silicone molds. Keep the pour temp steady, pre-warm the mold, and give it several hours to cool fully before unmolding.
Blended candles (beeswax plus coconut or paraffin) let you moderate the price and improve scent throw while keeping the burn benefits. A 50/50 beeswax-coconut blend is a popular middle ground for container candles.
If you're still choosing between waxes, the paraffin vs. soy comparison breaks down the trade-offs clearly and will help you decide how beeswax fits into your lineup.
Frequently Asked Questions
Is beeswax safe to use as a beginner?
Yes, with caveats. Beeswax is non-toxic and burns cleaner than paraffin. The main safety concern is the higher melt temperature. Use a double boiler, keep a thermometer on hand, and don't leave melting wax unattended. If you start with rolled sheets, there's no heat involved at all.
Why does my beeswax candle have white streaks or cracks?
Cracking and "bloom" (a white powdery film) are normal characteristics of beeswax, not defects. Bloom forms because beeswax is a natural material with variable composition. Many makers see it as a sign of authenticity. To minimize cracking, pour into pre-warmed molds and let the candle cool slowly at room temperature, away from drafts.
Can I add essential oils to beeswax candles?
You can, but the results are modest. Beeswax doesn't hold scent as readily as paraffin or coconut wax, and essential oils evaporate at higher temperatures. Add them at the lowest safe pour temperature and use a light hand. Lavender, eucalyptus, and citrus oils tend to perform better in beeswax than heavy florals or musks.
How much does beeswax cost compared to other waxes?
Expect to pay roughly $8 to $14 per pound for quality beeswax pellets, compared to $2 to $4 per pound for paraffin or $3 to $5 for soy. The burn time advantage partially offsets this per-candle, but for high-volume production the cost difference is significant.
Does beeswax really clean the air?
This is a claim that circulates widely in candle marketing, typically involving negative ions neutralizing pollutants. The science behind it is thin. Beeswax does burn more completely than paraffin and produces less soot, which is a real benefit. But claims of air purification go well beyond what the evidence supports. Make candles with beeswax because you like how it burns and smells, not because of air-quality promises.