Pouring & Technique
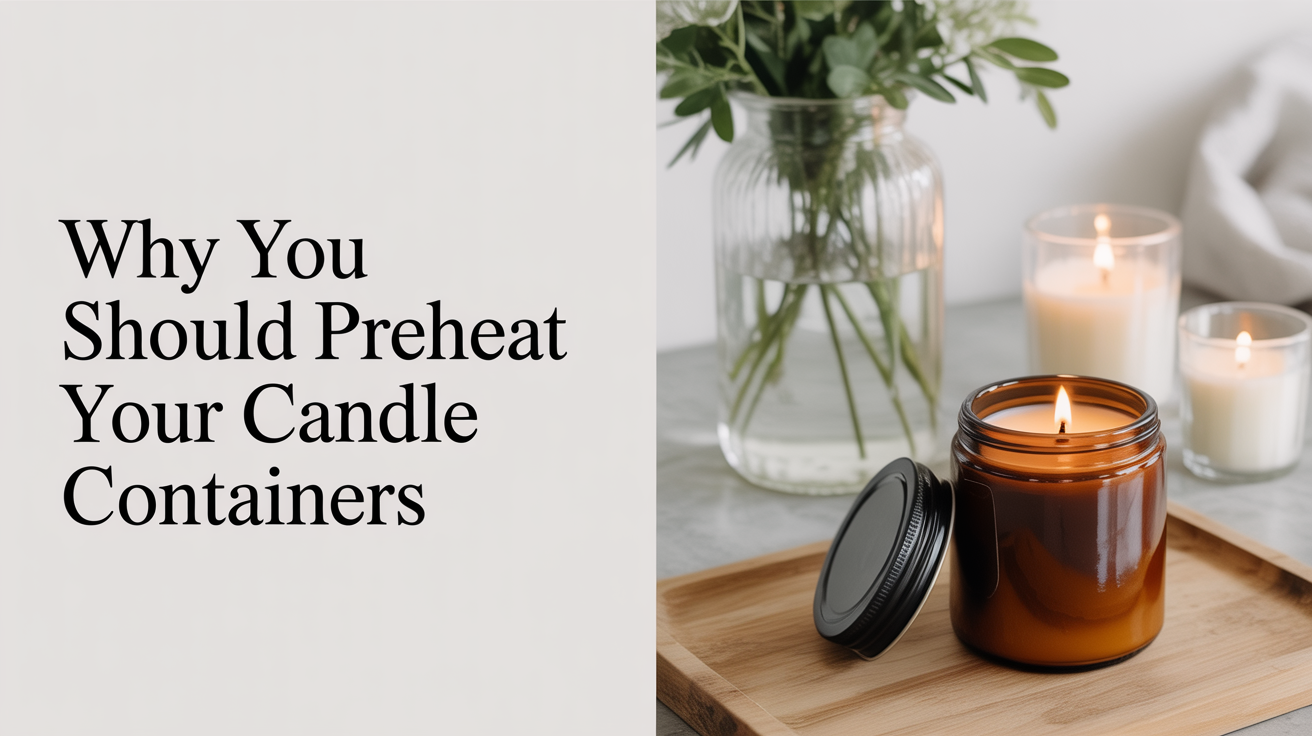
Why You Should Preheat Your Candle Containers
Preheating candle jars before pouring reduces wet spots and improves wax adhesion. Learn how and why warm jars before pouring makes a real difference.
You follow the recipe, pull your candle from the cooling rack, and notice a cloudy white patch where the wax has pulled away from the glass. Those marks are called wet spots, and they are one of the most common frustrations in beginner candle making. The good news is that one small step before you pour can cut them down considerably: warming your containers.
Preheating candle jars takes about two minutes of extra work, and it pays off in better-looking candles with fewer adhesion problems. This guide covers what happens when you skip the step, how to do it safely, and what else a warm jar does for your pour.
What Happens When Wax Hits a Cold Container
When you pour hot wax into a room-temperature glass jar, two things happen at once. The wax starts cooling from the outside edges where it contacts the glass, while the interior stays liquid longer. This uneven cooling rate causes the wax to shrink and contract at different speeds across the candle.
Glass is a poor conductor of heat, so a cold jar creates a sharp temperature boundary right at the wall. The wax cools so fast at that contact point that it pulls away slightly before fully bonding with the surface. The result is those cloudy, watery-looking patches you see through the glass.
Wet spots are a cosmetic issue, not a safety one. The candle burns fine. But if you are making candles to give away or sell, they matter quite a bit.
A related problem is sinkholes. As wax cools it shrinks in volume, and a cold container speeds that process unevenly. You can end up with a dipped center or a hollow air pocket beneath an otherwise smooth surface. Warming your jar slows the initial cooling rate, giving the wax more time to contract gradually and uniformly.
How Preheating Helps
When the jar is already warm, the temperature gap between the hot wax and the container wall is much smaller. The wax cools more slowly and evenly from the edges inward, which gives it a better chance to stay bonded to the glass throughout the process.
A warm container also helps with wax adhesion in a broader sense. Some waxes, particularly soy and coconut blends, are prone to shrinkage and surface issues. Pouring into a warmer vessel gives the wax more time to settle before the edges start to set.
You will not eliminate wet spots entirely by preheating alone. Factors like ambient room temperature, pour temperature, fragrance load, and the specific wax formula all play a role. But preheating is one of the easiest variables to control, and it consistently helps. For more on the pour temperature side of things, see candle pouring temperature: a beginner's guide.
Safe Methods for Warming Your Jars
There are three approaches that work well for beginners. All of them are simple, and none require special equipment beyond what most candle makers already have.
Warm oven method: Set your oven to its lowest setting, typically around 170 to 200°F (77 to 93°C). Place your glass jars on a baking sheet and let them warm for 10 to 15 minutes. You want the glass to feel warm to the touch, not hot. Pull them out with an oven mitt and pour your wax immediately. Work quickly so the jars do not cool back down before you pour.
One important caution here: never place glass that has just come from the freezer or refrigerator directly into a hot oven. That kind of rapid temperature swing can crack the glass. If your jars have been stored somewhere cold, let them come to room temperature first.
Heat gun method: A heat gun (or even a hair dryer set to high) lets you warm individual jars right on your work surface. Hold the nozzle several inches from the glass and move it in slow circles around the outside of the jar for about 30 to 60 seconds. The glass should feel warm when you press your palm to it, roughly 100 to 120°F (38 to 49°C). This method is fast and gives you good control.
Warm water bath method: Fill a basin or large bowl with hot tap water, around 110 to 120°F (43 to 49°C). Submerge your jars (without lids) for a few minutes. Dry them thoroughly before pouring. Any water inside the jar is a hazard with hot wax: water can cause wax to spatter and steam violently. Make sure the inside is completely dry.
For all methods, you are aiming for a jar that feels comfortably warm, not hot enough to be uncomfortable to hold. You are not trying to melt anything or get the glass close to your pouring temperature. You just want to take the chill off.
Fitting Preheating Into Your Pour Process
The easiest way to build this habit is to warm your jars while your wax is melting. By the time your wax reaches the right pouring temperature, your jars are already warm and waiting.
A quick process that works:
- Place jars in the oven on low while you set up your pouring station.
- Melt your wax and add fragrance oil at the right temperature.
- Pull your jars from the oven with a mitt and set them on a heat-safe mat or silicone trivet.
- Pour your wax, then cover loosely with a piece of cardboard or a lid placed slightly ajar to slow surface cooling.
Step four matters too. Drafts and uneven surface cooling cause their own problems, including rough or cracked tops. Covering the candles lightly right after pouring lets them cool at a more controlled rate. You can read more about the full soy pour sequence in how to pour a soy candle step by step.
If you are still ending up with an uneven surface after all of this, there is a repair option. Once the candle has fully set, a quick pass with a heat gun can smooth minor imperfections. The guide on how to get a smooth candle top covers exactly that.
When Preheating Matters Most
Preheating makes the biggest difference in certain situations:
Cold rooms. If your workspace is below 65°F (18°C), glass jars sitting on the counter can be quite cold. The temperature gap between cold glass and wax poured at 130 to 160°F (54 to 71°C) is significant. In a warm summer kitchen you might see fewer adhesion problems without preheating than you would in a cool garage workshop in winter.
Wide-mouth containers. Wide jars have more surface area in contact with the wax, which gives wet spots more room to appear. Preheating pays off more with these shapes.
Soy and coconut waxes. These natural waxes shrink more during cooling than paraffin does. They are generally more prone to adhesion problems, and preheating helps compensate.
Decorative or gift candles. If the candle's appearance matters for its end purpose, taking the extra step is worth it. For test batches where you are just checking fragrance throw or burn time, you might skip it.
Frequently Asked Questions
Does preheating guarantee no wet spots?
No. Wet spots can result from several factors: the wax formula, ambient temperature, pour temperature, and how quickly the candle cools. Preheating reduces the likelihood by narrowing the temperature gap between the wax and the glass, but it is one factor among several, not a complete fix on its own.
How warm should my jars be before I pour?
Aim for jars that feel warm to the touch, roughly 100 to 120°F (38 to 49°C). You are not trying to match your pour temperature; you are just removing the cold from the glass. A jar that feels hot enough to be uncomfortable is too warm and could interfere with your wick sticker adhesive or cause thermal shock concerns if there are any defects in the glass.
Can I skip preheating if I pour at a higher temperature?
Pouring hotter helps with some wax adhesion issues, but it introduces other problems like faster fragrance evaporation and increased sinkholes as a larger mass of hot wax cools. Preheating the jar and pouring at the correct temperature for your wax is a better combination than raising your pour temp to compensate for cold glass.
Will preheating affect my wick tabs or adhesive dots?
It can. If you secure your wick to the bottom of the jar before warming it in the oven, the heat may loosen the adhesive. The better sequence is to warm your jars first, let them cool just enough to be handleable, then press in the wick tab. The jar will still be warm enough to help with adhesion when you pour.
What if I do not have a heat gun or want to skip the oven?
Warm tap water works. Fill your jars with hot tap water for a few minutes, empty them completely, and dry them very thoroughly, inside and out. No moisture should remain before you pour. A damp jar and hot wax is a safety problem, so do not rush the drying step.